Free Crochet Fairy Mobile Pattern: 4 Fairies + Stars
FREE CROCHET PATTERN • CROCHET FAVORITES
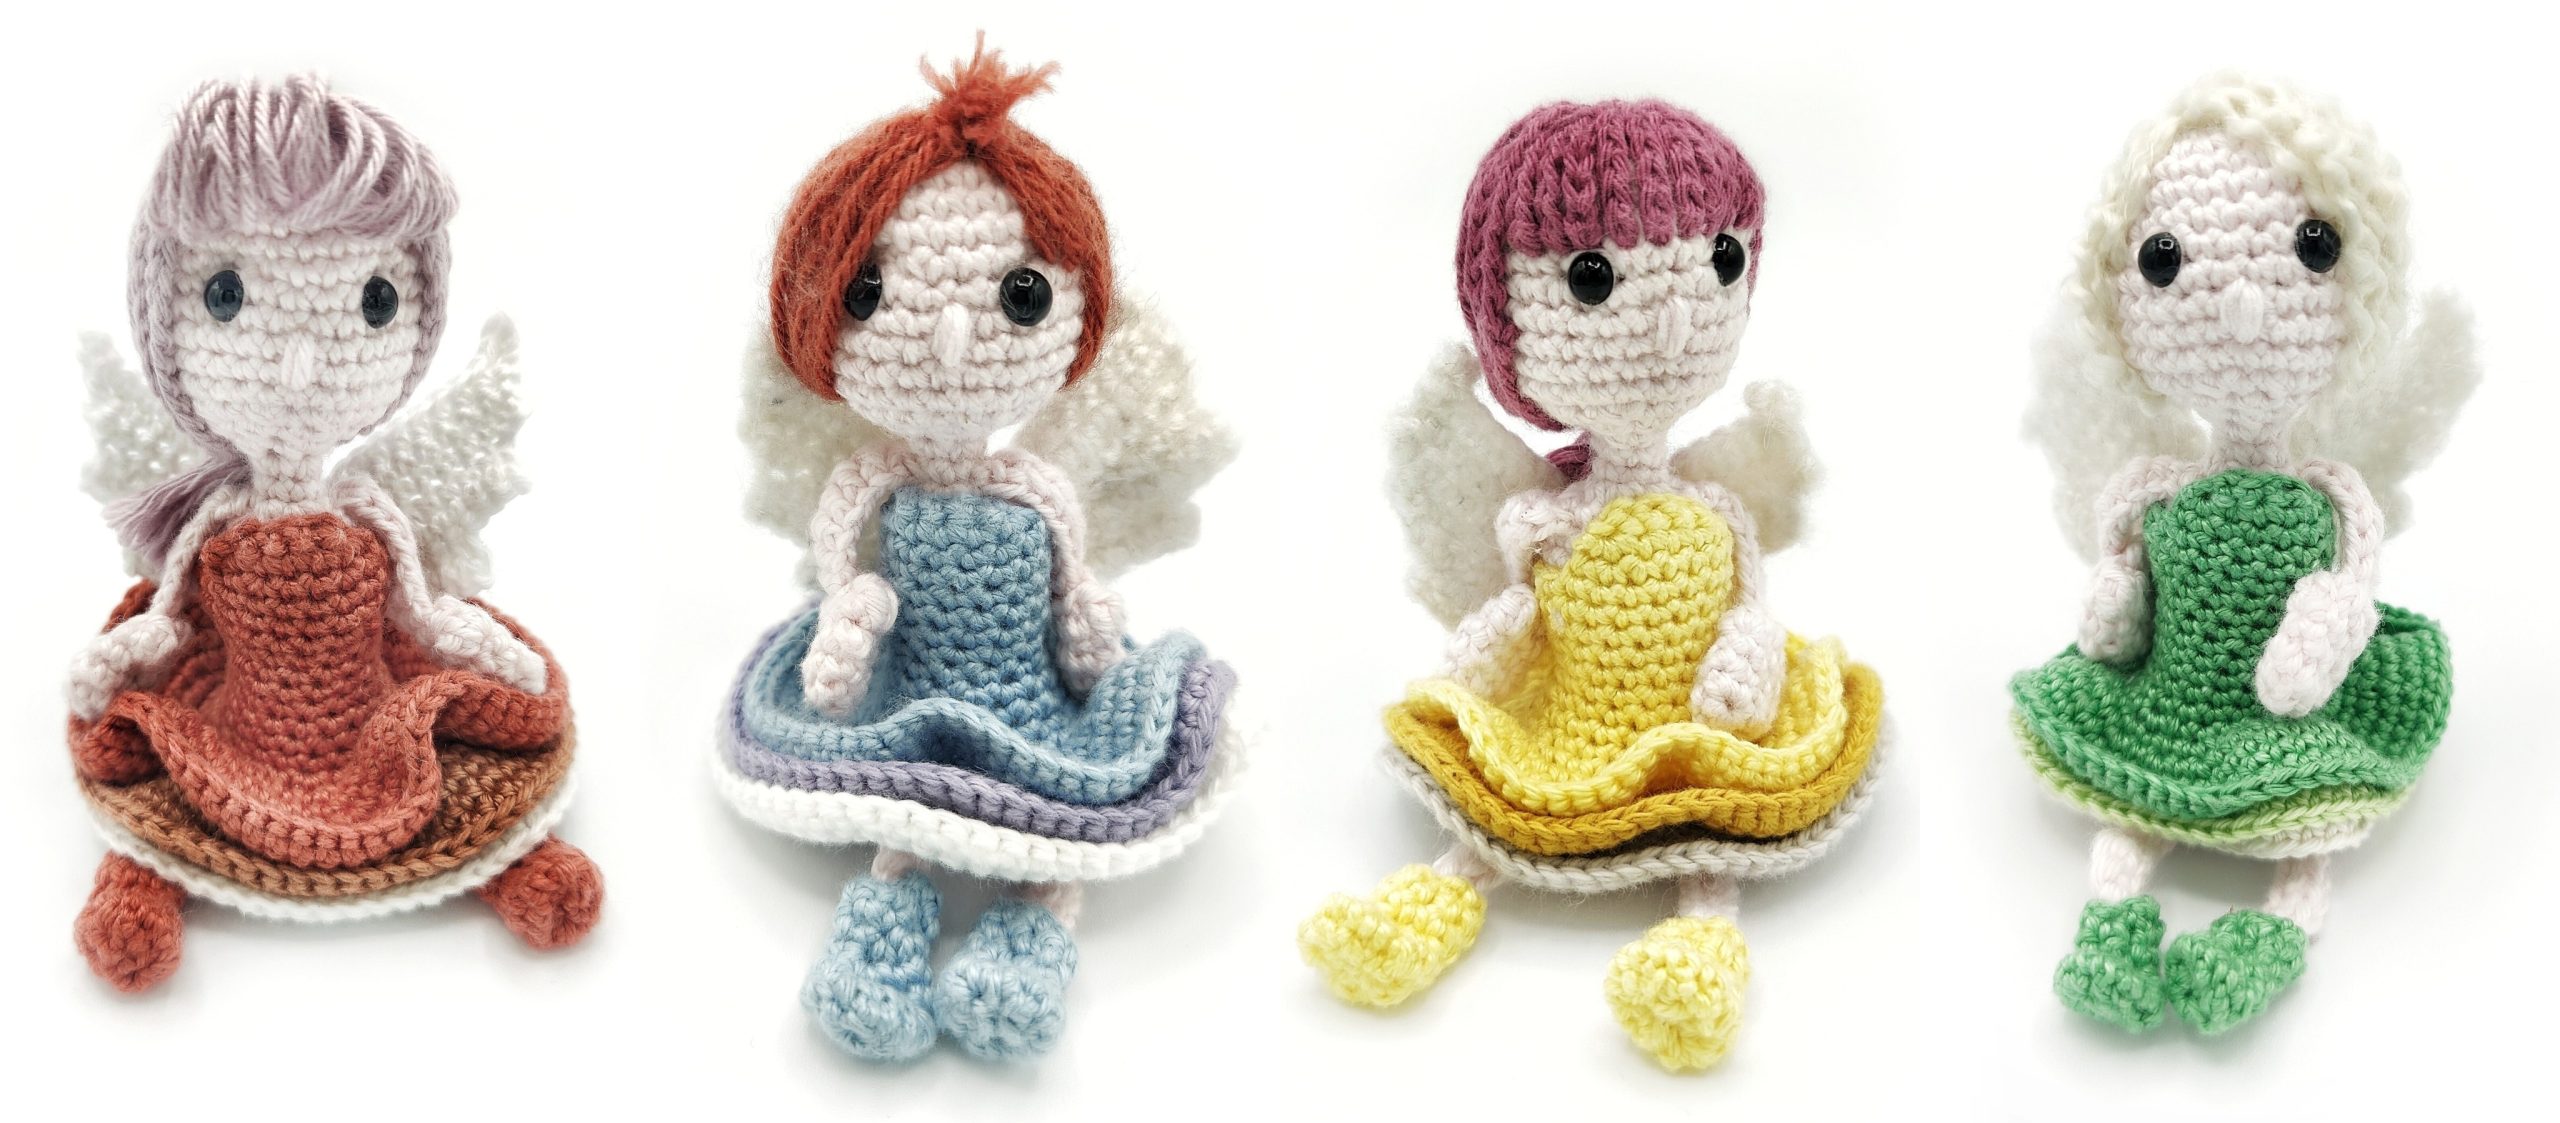
Turn one small fairy construction into a complete nursery mobile with four personalities, layered dresses, wings, padded stars and a covered hanging ring. The crochet itself is approachable; the real craft is in the finishing, color planning and balanced assembly.
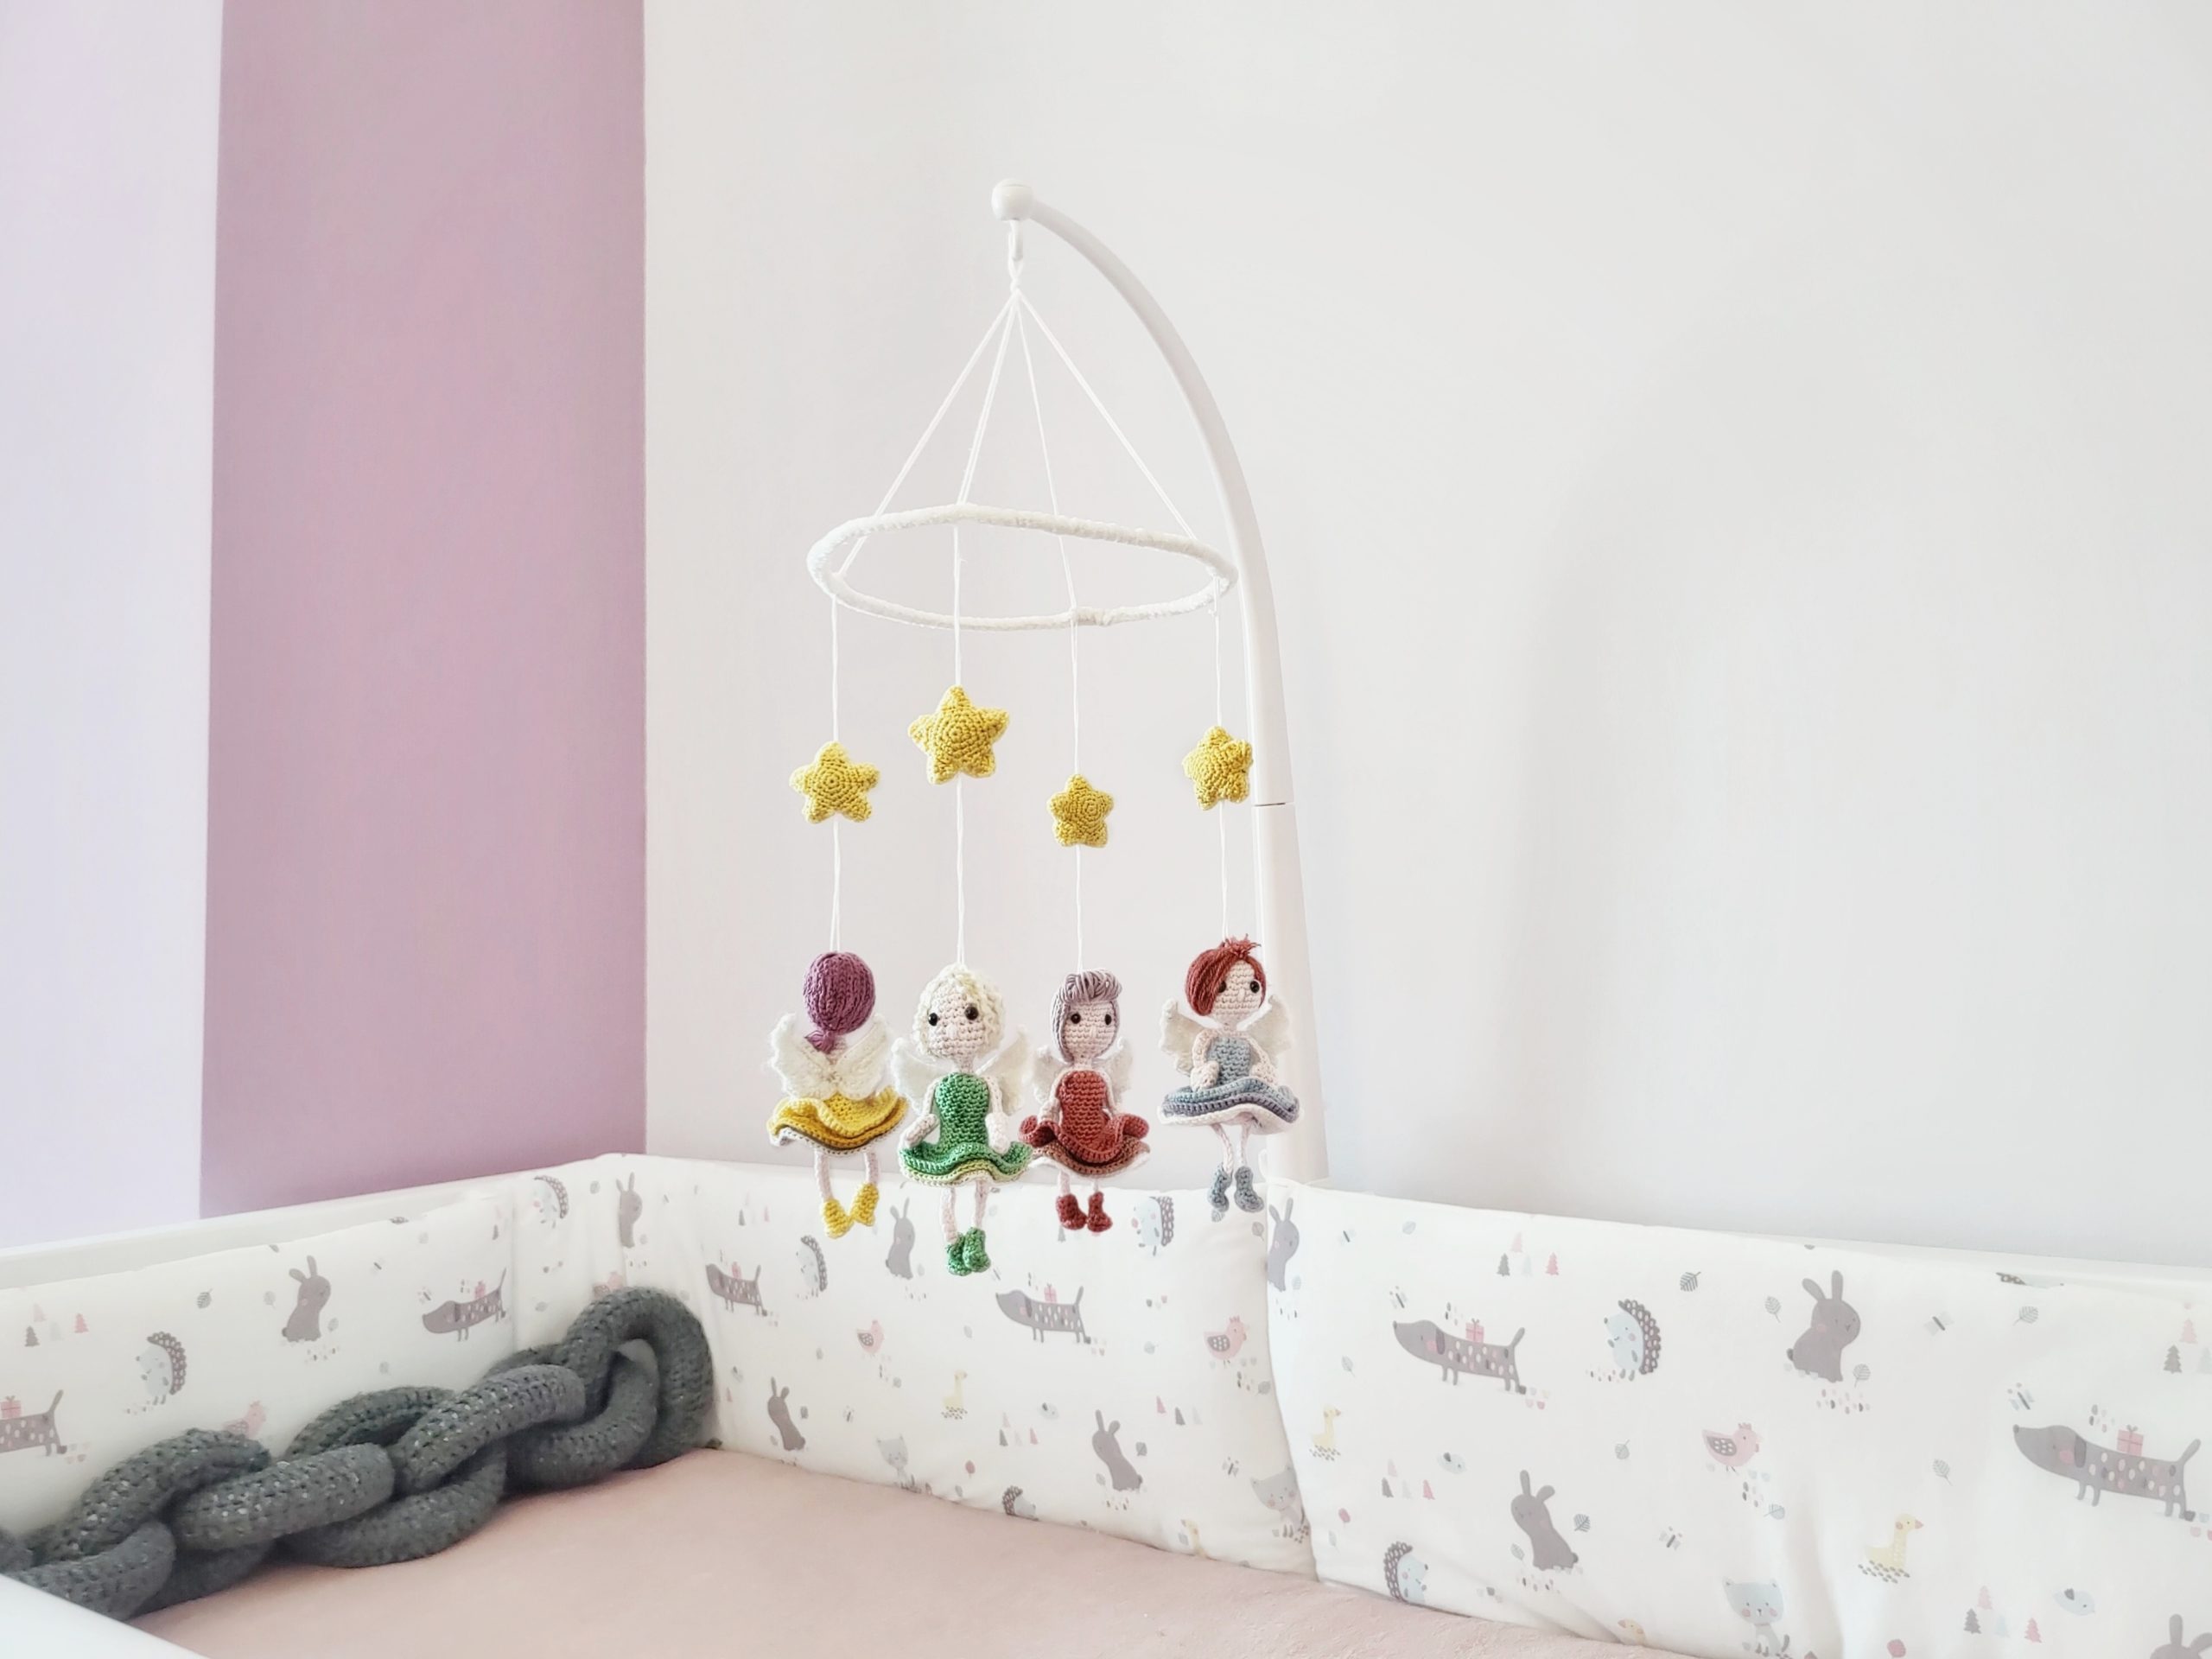
The finished fairy mobile uses four fairies and four padded stars.
PRINTABLE PDF
Want the pattern without browser distractions? Add the Nursery Dreams 3-in-1 printable PDF Etsy link here before publishing.
Project at a Glance
| Skill level | Easy, with multi-piece assembly |
| Sample hook | 2.5 mm |
| Yarn | Super-fine yarn; sample gauge 10 cm = 23 stitches |
| Fairy size | Approx. 13 cm / 5.1 in |
| Mobile ring | Approx. 20 cm / 7.9 in diameter |
| Main pieces | 4 fairies, 4 padded stars, covered ring |
| Terminology | US crochet terms |
Materials
Super-fine yarn in skin, hair, dress and star colors
2.5 mm crochet hook (sample size)
6 mm safety eyes, or embroidery thread for eyes
Polyester fiberfill
Yarn/darning needle
Scissors and stitch marker
Approx. 20 cm / 7.9 in mobile ring, or a securely formed and fully covered ring
Strong yarn or cord for hanging
Measuring tape and pins for final placement
NURSERY FINISH
For infant-facing decor, embroidered eyes avoid removable small parts. Keep the finished mobile completely out of reach.
Abbreviations
| MR | magic ring |
| ch | chain |
| sl st | slip stitch |
| sc | single crochet |
| inc | increase |
| dec | decrease |
| FSC | foundation single crochet |
| st(s) | stitch(es) |
| R | round / row |
Full Crochet Fairy Mobile Pattern
Make four fairies. The body construction is the same; vary dress colors and hairstyles so the set feels coordinated without looking identical.
1. Fairy Body — Head to Neck
Work the head and body as one continuous piece in the main skin color. Place eye markers during R9; the sample uses 6 mm safety eyes.
| Round | Stitch sequence | Sts |
| R1 | 5 sc in MR | 5 |
| R2 | inc around | 10 |
| R3 | (sc, inc) around — increase every 2nd stitch | 15 |
| R4 | increase every 3rd stitch | 20 |
| R5 | increase every 4th stitch | 25 |
| R6-R13 | sc around. In R9 mark eye positions after stitch 3 and stitch 8. | 25 |
| R14 | Decrease every 2nd stitch 8 times; sc in last stitch. | 17 |
| R15 | Decrease 8 times; sc in last stitch. | 9 |
| R16 | dec twice; sc in each of last 5 stitches. | 7 |
| R17-R18 | sc around | 7 |
STUFF NOW
After R15, stuff the head firmly but evenly. Keep the neck slightly softer so the silhouette stays smooth.
2. Fairy Body — Torso & Closure
| Round | Stitch sequence | Sts |
| R19 | inc around | 14 |
| R20 | sc 1; 3 sc in next; sc 6; 3 sc in next; sc 5 | 18 |
| R21-R22 | sc around | 18 |
| R23 | sc 2; dec; sc 7; dec; sc 5 | 16 |
| R24 | sc 1; dec; sc 6; dec; sc 5 | 14 |
| R25-R26 | sc around; change to undergarment color in last stitch of R26 | 14 |
| R27 | sc 2; inc; sc 6; inc; sc 4 | 16 |
| R28 | sc 3; inc; sc 7; inc; sc 4 | 18 |
| R29 | sc 4; inc; sc 8; inc; sc 4 | 20 |
| R30 | sc 5; inc; sc 9; inc; sc 4 | 22 |
| R31 | dec around | 11 |
| R32 | dec around to close; weave in end | closed |
SHAPE CHECK
Stuff the torso before R32. The base should be rounded, not overfilled; the dress will sit over this shape.
3. Arms, Hands, Legs & Shoes
Arms — make 2
Work 10 FSC. Leave a yarn tail at both ends. Use one tail to sew the arm to the body and the other to attach the hand. Alternative: chain 11, then sc back across 10 stitches.
Hands — make 2
| Round | Stitch sequence | Sts |
| R1 | 6 sc in MR | 6 |
| R2 | (sc, inc) x3 | 9 |
| R3 | sc around | 9 |
| R4 | sc 8; 1 bobble in last stitch | 9 |
| R5 | (sc, dec) x3 | 6 |
Weave in the hand yarn end. Use the arm tail to sew the arm into the inside of the hand.
Legs — make 2
Work 12 FSC. Leave a yarn tail at both ends. Use one tail to sew the leg to the body and the other to secure the shoe. Alternative: chain 13, then sc back across 12 stitches.
Shoes — make 2
| Round | Stitch sequence | Sts |
| Start | Ch 7 | — |
| R1 | Join to first chain to form a ring; sc around | 7 |
| R2 | sc around | 7 |
| R3 | sc 6; 3 sc in last stitch | 9 |
| R4 | sc 7; 3 sc in next stitch; sc 1 | 11 |
| R5 | sc around | 11 |
| R6 | dec around and close | closed |
4. Layered Dress — Outer Layer
The dress has three color layers. The first layer is built directly around the body; the inner layers begin from unused loops in the previous layer.
| Round | Stitch sequence | Sts |
| Start | Ch 4 including turning chain; turn | — |
| R1 | inc first stitch; sc 1; inc last stitch; ch 1, turn | 5 |
| R2 | inc; sc 3; inc. Ch 11, place piece on chest, then sc around body back into first stitch to close. | 18 |
| R3-R4 | sc around | 18 |
| R5 | sc 7; dec; sc 7; dec | 16 |
| R6 | sc 6; dec; sc 6; dec | 14 |
| R7-R9 | sc around | 14 |
| R10 | inc; sc 7; inc; sc 5 | 16 |
| R11 | sc 1; inc; sc 8; inc; sc 5 | 18 |
| R12 | sc 2; inc; sc 9; inc; sc 5 | 20 |
| R13 | sc 3; inc twice; sc 8; inc twice; sc 5 | 24 |
| R14 | increase every 4th stitch | 30 |
| R15 | OUTER LOOPS ONLY: increase every 3rd stitch | 40 |
| R16 | Both loops: increase every 2nd stitch | 60 |
| R17-R20 | sc around; sl st last stitch of R20 and weave in ends | 60 |
5. Layered Dress — Inner Layers
Second layer
Join a new color to the unused inner loops of R15 from the first layer.
| Round | Stitch sequence | Sts |
| R15 | INNER LOOPS ONLY: increase every 3rd stitch | 40 |
| R16 | OUTER LOOPS ONLY: increase every 2nd stitch | 60 |
| R17-R20 | Both loops: sc around; sl st at end and weave in | 60 |
Third layer
Join a third color to the unused inner loops of R16 from the second layer.
| Round | Stitch sequence | Sts |
| R16 | INNER LOOPS ONLY: increase every 2nd stitch | 60 |
| R17-R20 | Both loops: sc around; sl st at end and weave in | 60 |
PALETTE PLANNING
Repeat one neutral across all four fairies and rotate two accent colors. This keeps the mobile cohesive while every fairy still feels different.

Use hairstyle and dress color changes to give each fairy a distinct personality.
6. Hair, Fringe & Face
Hair option A — chain strands
Make 18 chain strands of 17 chains each. Sew two strands into each placement point for a dense look, working from the top of the head toward the middle. Use strand tails or short chains to create forehead fringe.
Hair option B — short fringe
Add 10 short strands of 6 chains each across the forehead, then work longer hair similarly to option A.
Hair option C — textured yarn
Use medium or boucle yarn. Sew strands in pairs between approximately R1/R2 and R13 until the crown is covered. Fold a few ends back toward the crown for soft fringe.
Nose
With skin-color yarn, bring the needle from the back of the head to the center front one row below the eyes, around R10. Stitch vertically down two rows and back up. Repeat two more times for a small raised nose, then secure the ends inside the head.
FACE PLACEMENT
Before securing anything permanently, view the fairy straight on. A one-stitch shift in the eyes, nose or fringe changes the expression noticeably.
7. Wings — Make 2
Work in white yarn. The wing is built in short rows with skipped stitches to create the tapered outer edge.
| Round | Stitch sequence | Sts |
| Start | Ch 8 | — |
| R1 | From 2nd ch: sc 6; 5 sc in last chain; work back on other side with sc 5. Leave last 2 chains unworked. Ch 1, turn. | 16 |
| R2 | sc 5; inc in next 3 stitches; sc in last 8. Ch 3, turn. | 19 |
| R3 | From 2nd chain: sc 2; sc in next 9 stitches; inc in next 3; sc in next 4. Leave last 3 stitches unworked. Ch 1, turn. | 23 |
| R4 | sc 8; sl st in 9th stitch. Leave remaining stitches unworked. | — |
Repeat for the second wing. Leave a yarn tail to join the wings together and sew them centered to the upper back.
8. Padded Star — Make 4 Finished Stars
Each finished star uses two matching flat stars sewn together and lightly stuffed. Make 8 flat pieces total.
Center rounds
| Round | Stitch sequence | Sts |
| R1 | 5 sc in MR | 5 |
| R2 | inc around | 10 |
| R3 | increase every 2nd stitch | 15 |
| R4 | increase every 3rd stitch | 20 |
Point 1
Ch 5.
Row 1: sc in first 2 chains, dec; sl st to stitch 1 of the new working round. Ch 1, turn. [3]
Row 2: skip sl st; sc across 3. Ch 1, turn. [3]
Row 3: dec, sc 1; sl st to stitch 3 of the working round. Ch 1, turn. [2]
Row 4: skip sl st; dec last 2 stitches. Ch 1, turn. [1]
Row 5: skip sc and sl st to stitch 4 of the working round.
Point 2
Repeat the same 5-row point sequence over the next 4 base stitches, attaching to base stitches 5, 7 and 8 as the rows progress.
Points 3–5
Point 3: attach rows to base stitches 9, 11 and 12.
Point 4: attach rows to base stitches 13, 15 and 16.
Point 5: attach rows to base stitches 17, 19 and 20.
Finish each star
Make two identical flat star pieces.
Leave a long sewing tail on one piece; weave in the ends on the other.
Place the two pieces together with edges aligned.
Sew around the edge, adding a small amount of fiberfill before closing.
Shape all five points with your fingers and secure the final tail inside.
9. Cover the Ring & Assemble the Mobile
Use a mobile ring of about 20 cm / 7.9 in, or form a secure ring from approximately 63 cm / 24.8 in of suitable wire. If using wire, fully secure and cover the join.
Join yarn to the ring and work single crochet around the entire circumference until no ring is visible. Slip stitch to join and secure the ends.
Cut four hanging strands. They may be equal or slightly staggered.
Sew through the top of a fairy, continue through the center of one star, then attach both strand ends securely to the covered ring.
Repeat for all four fairies, spacing attachment points evenly.
Create the top suspension by running two strong strands across opposite sides of the ring so they cross at the center. Gather them into a secure hanging loop.
| Sample spacing | Approx. length |
| Fairy to star | 8 cm / 3.1 in |
| Star to ring | 7 cm / 2.8 in |
| Ring to top loop | 18 cm / 7.1 in |
| Across opposite sides of ring | 42 cm / 16.5 in including top loop |
BALANCE BEFORE FINAL KNOTS
Lift the mobile and rotate it slowly. Adjust one strand at a time until the ring hangs level and each fairy has clear space to move.
Use the finished mobile as a layout reference, then adjust spacing for your own ring and room.
Safety & Display
This mobile is decorative nursery decor, not a toy. Keep every cord and crochet piece completely out of reach. Do not place loose pieces inside the crib. Check knots and suspension regularly, and remove the mobile from the crib area by 5 months or when the baby pushes up on hands and knees, whichever comes first.
FAQ
Is this fairy mobile pattern beginner-friendly?
The crochet itself is rated easy, but there are many small pieces and the project is assembly-heavy. A confident beginner who is comfortable sewing amigurumi pieces can work through it.
Can I make the fairies in different colors?
Yes. Keeping one shared neutral or skin palette while changing dress layers and hairstyles creates a cohesive set without making the four fairies identical.
Can I embroider the eyes?
Yes. For infant-facing nursery decor, embroidered eyes avoid removable small parts.
Can I use a different ring size?
Yes, but the sample spacing is based on a ring of about 20 cm / 7.9 in. Rebalance strand lengths if you change the support size.