Woodland Dryad Crochet Pattern: Make a Forest Spirit Amigurumi
PUBLISHING METADATA – DO NOT PUBLISH AS BODY COPY
ARTICLE BODY START
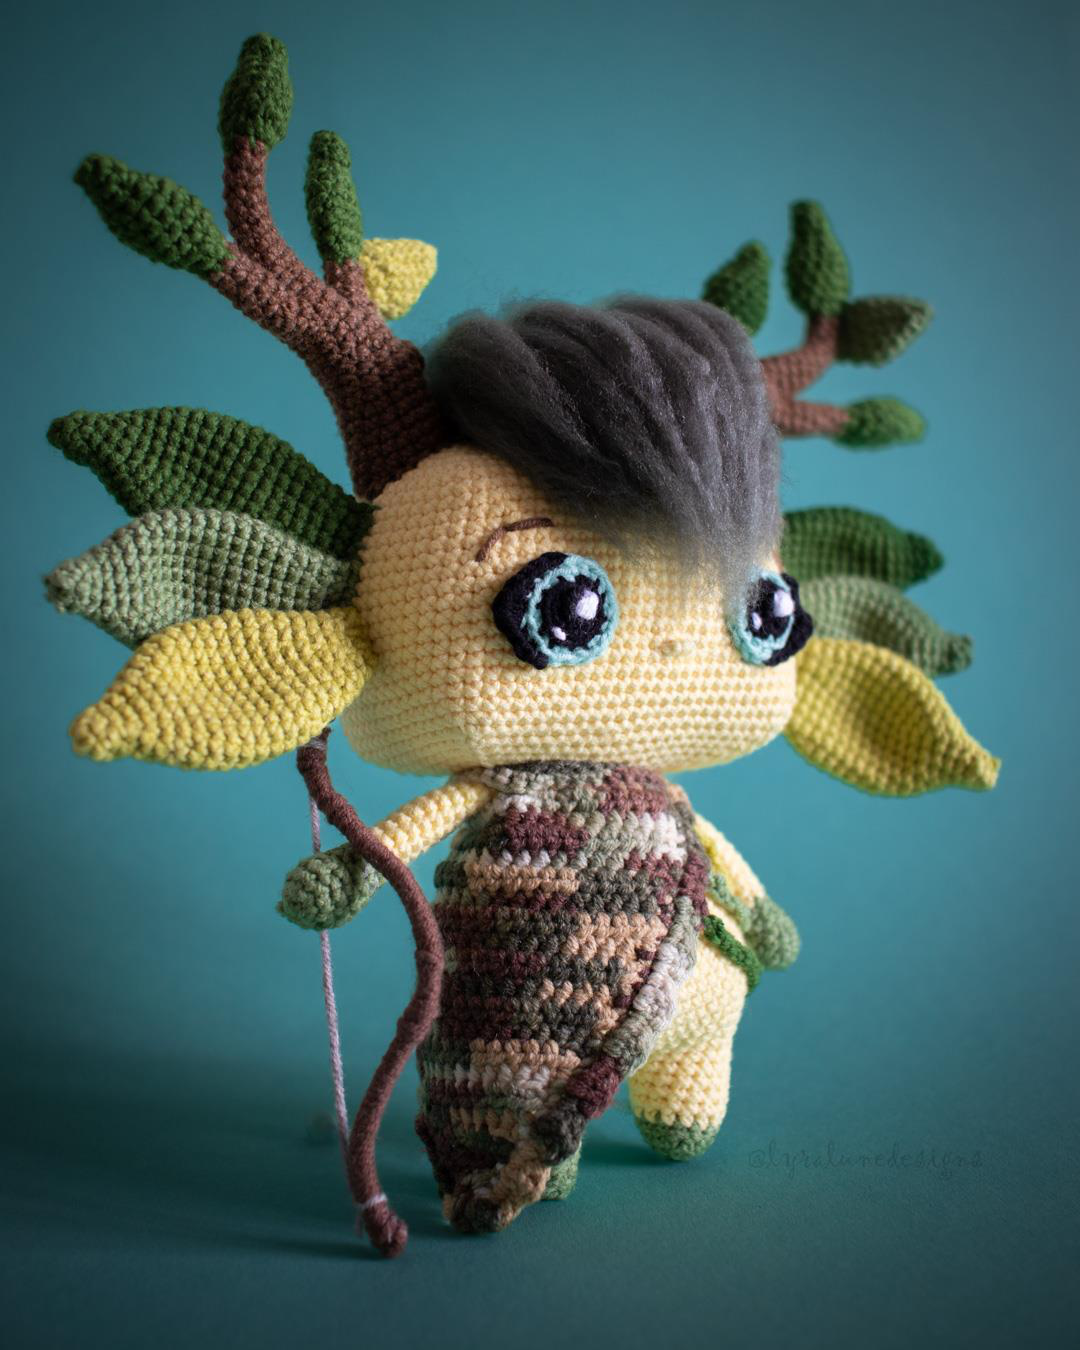
A detailed fantasy amigurumi project with leafy branches, oversized crochet eyes, brushed yarn hair and a textured woodland tunic.
If you love woodland creatures, fantasy crochet and character-rich amigurumi, the forest spirit is a project full of memorable details. The finished dryad measures approximately 21 cm / 8.25 inches from the tips of the branches to the feet when made with the suggested materials.
This article follows the project in the same sequence as the pattern PDF: preparation and materials first, then each crocheted component, assembly, and finally the basic techniques used throughout the project.
Quick Project Overview
| Detail | Specification |
| Finished size | Approx. 21 cm / 8.25 inches tall |
| Hook | 2.25 mm |
| Yarn | Sport weight (No. 2), plus DK acrylic yarn for the hair |
| Main techniques | Magic ring, single crochet, BLO, invisible decrease, hdc, dc, loop stitch and bobble stitch |
In This Guide
| Project sequence | |
| Before You Begin | General Advice and Tips |
| Head | Body and Legs |
| Leaves | Arms |
| Eyes | Branches |
| Tunic | Hair |
| Assembly | Basic Crochet Techniques |
Before You Begin
Abbreviations
| Abbr. | Meaning | Abbr. | Meaning |
| Ch | chain stitch | MR | magic ring |
| Sc | single crochet | Rnd | round |
| Inc | increase | St | stitch |
| Dec | invisible decrease | Sl st | slip stitch |
| Hdc | half double crochet | 3 sc tog | crochet a decrease with three stitches |
| Hdc inc | half double crochet increase | BLO | back loops only |
| Hdc dec | half double crochet decrease | (….) x … | repeat instructions in brackets |
| Dc | double crochet | [..] | total number of stitches in the row |
| F.O. | fasten off | ||
Materials
| Type | What you need |
| Yarn | Sport weight (No. 2) – YarnArt Jeans |
| Yarn | Sport weight (No. 2) – Alize Cotton Gold |
| Hair yarn | DK weight (No. 3) acrylic yarn – grey-green (sample: Schachenmayr Bravo, Loden 08347) |
| Hook | 2.25 mm |
| Tools | Yarn needle; stitch marker; pins; scissors |
| Stuffing / structure | Stuffing; wire for the branches |
| Hair finishing | Pet brush for the hair |
SIZING NOTE
You can use a different yarn size, color or fiber. The finished size will change with your yarn and hook combination. With the indicated materials, the forest spirit measures about 21 cm / 8.25 inches from the tips of the branches to the feet.

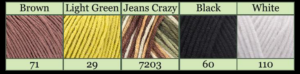
Suggested yarn colors from the pattern reference.
General Advice and Tips
Keep your tension tight so the stitches remain neat and no stuffing shows through.
To make the toy smaller or larger, change the yarn size, hook size, or both. Thicker yarn / a larger hook makes a larger toy; thinner yarn / a smaller hook makes a smaller toy.
When working in the round, start with a magic circle or foundation chain and crochet continuously without joining with a slip stitch at the end of each round. Use a stitch marker to track the end of the round.
For amigurumi, the Yarn Under / Yarn Over single crochet method produces compact X-shaped stitches.
Keep the project right side out. The right side shows neat X stitches (YU/YO) or V stitches (YO/YO); the magic-ring tail should be on the inside. When the work is right side out, you will be crocheting clockwise.
Stuff gradually and firmly, but stop before the stitches begin to stretch.
Head
Work with LIGHT YELLOW yarn. Make a foundation chain and work around it in a continuous spiral.
| Round / Row | Instructions | Total |
| 1 | Chain 15 | [15] |
| 2 | From the second chain from hook: 13 sc, 3 sc in the next stitch; continue on the underside of the chain: 12 sc, inc. Sl st into the 1st sc stitch (not counted in the total). The sl st will be the last stitch of this round. | [30] |
| 3 | (12 sc, 3 sc in next stitch, 1 sc, 3 sc in next stitch) x 2 | [38] |
| 4 | (13 sc, 3 sc in next stitch, 3 sc, 3 sc in next stitch, 1 sc) x 2 | [46] |
| 5 | (14 sc, 3 sc in next stitch, 5 sc, 3 sc in next stitch, 2 sc) x 2 | [54] |
| 6 | (15 sc, 3 sc in next stitch, 7 sc, 3 sc in next stitch, 3 sc) x 2 | [62] |
| 7 | (16 sc, 3 sc in next stitch, 9 sc, 3 sc in next stitch, 4 sc) x 2 | [70] |
| 8 | (17 sc, 3 sc in next stitch, 11 sc, 3 sc in next stitch, 5 sc) x 2 | [78] |
| 9 | (18 sc, 3 sc in next stitch, 13 sc, 3 sc in next stitch, 6 sc) x 2 | [86] |
| 10-28 | 86 sc (19 rounds) | [86] |
ALIGNMENT CHECKPOINT
Because continuous rounds naturally spiral, offset the starting point after Round 28 so the corner decreases align. Crochet 2 additional sc, move the stitch marker to the second of those stitches, and begin Round 29 at the next stitch. Adjust the start point further if your corners need it.
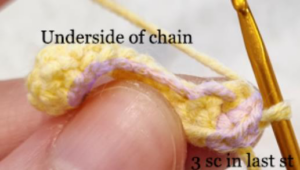


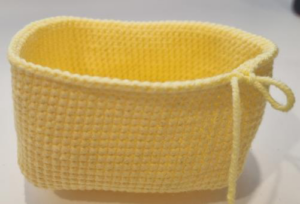
Head construction: working around the foundation chain and establishing the oval shape.
| Round / Row | Instructions | Total |
| 29 | (18 sc, sc 3 together, 13 sc, sc 3 together, 6 sc) x 2 | [78] |
| 30 | (17 sc, 3 sc tog, 11 sc, 3 sc tog, 5 sc) x 2 | [70] |
| 31 | (16 sc, 3 sc tog, 9 sc, 3 sc tog, 4 sc) x 2 | [62] |
| 32 | (15 sc, 3 sc tog, 7 sc, 3 sc tog, 3 sc) x 2 | [54] |
| 33 | (14 sc, 3 sc tog, 5 sc, 3 sc tog, 2 sc) x 2 | [46] |
| 34 | (13 sc, 3 sc tog, 3 sc, 3 sc tog, 1 sc) x 2 | [38] |
| 35 | (12 sc, 3 sc tog, 1 sc, 3 sc tog) x 2 | [30] |
| 36 | 11 sc, (dec) x 2, 11 sc, (dec) x 2 | [26] |
STUFF AND CLOSE
Start stuffing after Round 35. Do not overstuff or the head may lose its rectangular-oval shape. After Round 36, work 1 sl st, fasten off with a long tail, sew the opening closed with a yarn needle, and weave the tail into the head.


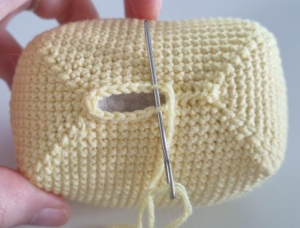

Head stuffing, closure and finished shape.
Body and Legs
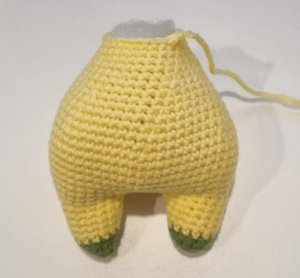
Make 2 legs. Begin with GREEN yarn and work in a continuous spiral.
| Round / Row | Instructions | Total |
| 1 | 6 sc in a magic ring | [6] |
| 2 | (inc, sc) x 3 | [9] |
| 3 | (inc, 2 sc) x 3 | [12] |
| 4 | inc, 11 sc | [13] |
| 5 | Change to LIGHT YELLOW yarn. inc, 12 sc | [14] |
| 6 | inc, 13 sc | [15] |
| 7 | inc, 14 sc | [16] |
| 8 | inc, 15 sc | [17] |
| 9 | 17 sc | [17] |
BEFORE JOINING
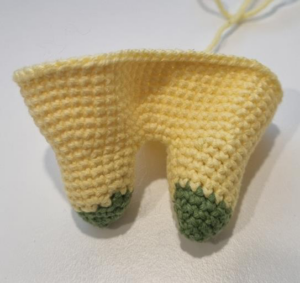
Fasten off the first leg and make the second the same way. After the second leg, do not cut the yarn. Chain 4 and attach the chain with a sl st to the first leg. Position the color changes inward; add a few stitches to either leg first if needed to align them.
| Round / Row | Instructions | Total |
| 1 | 17 sc around first leg, 4 sc on chain, 17 sc around second leg, 4 sc on the other side of the chain | [42] |
| 2 | (6 sc, inc) x 6 | [48] |
| 3 | (7 sc, inc) x 6 | [54] |
| 4 | (8 sc, inc) x 6. Stuff the legs firmly. | [60] |
| 5-10 | 60 sc (6 rounds) | [60] |
| 11 | (8 sc, dec) x 6 | [54] |
| 12 | 54 sc | [54] |
| 13 | (7 sc, dec) x 6 | [48] |
| 14 | 48 sc | [48] |
| 15 | (6 sc, dec) x 6 | [42] |
| 16 | 42 sc | [42] |
| 17 | (5 sc, dec) x 6 | [36] |
| 18 | 36 sc | [36] |
| 19 | (10 sc, dec) x 3 | [33] |
| 20 | 33 sc | [33] |
| 21 | (9 sc, dec) x 3 | [30] |
| 22 | 30 sc | [30] |
| 23 | (8 sc, dec) x 3 | [27] |
| 24 | 27 sc. Stuff firmly, F.O. and leave a long thread for sewing. | [27] |
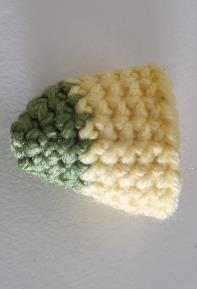
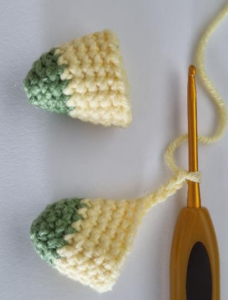

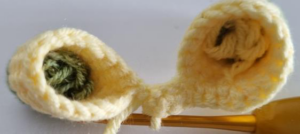
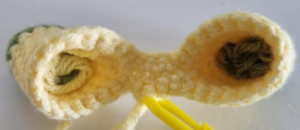
Leg construction, joining the legs and shaping the body.
Leaves
Small Leaves
Make 2 small leaves for the branches: one in LIGHT GREEN and one in GREEN. Work in a continuous spiral.
| Round / Row | Instructions | Total |
| 1 | 4 sc in a magic ring | [4] |
| 2 | (sc, inc) x 2 | [6] |
| 3 | (2 sc, inc) x 2 | [8] |
| 4 | (3 sc, inc) x 2 | [10] |
| 5 | (4 sc, inc) x 2 | [12] |
| 6-7 | 12 sc (2 rounds) | [12] |
| 8 | (dec) x 6 | [6] |
FINISH
Do not stuff. Flatten at the last round and crochet 2-3 sc through both sides to close. Fasten off and leave a long tail for sewing.
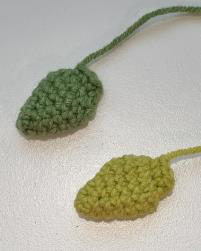
Small leaves: finished shape and color references.
Big Leaves
Make 2 big leaves in DARK GREEN, 2 in GREEN and 2 in LIGHT GREEN. Work in a continuous spiral.
| Round / Row | Instructions | Total |
| 1 | 6 sc in a magic ring | [6] |
| 2 | 6 sc | [6] |
| 3 | (2 sc, inc) x 2 | [8] |
| 4 | (3 sc, inc) x 2 | [10] |
| 5 | (4 sc, inc) x 2 | [12] |
| 6 | (3 sc, inc) x 3 | [15] |
| 7 | (4 sc, inc) x 3 | [18] |
| 8 | (5 sc, inc) x 3 | [21] |
| 9-15 | 21 sc (7 rounds) | [21] |
| 16 | (5 sc, dec) x 3 | [18] |
| 17 | (4 sc, dec) x 3 | [15] |
| 18 | 15 sc | [15] |
| 19 | (3 sc, dec) x 3 | [12] |
| 20 | 12 sc | [12] |
| 21 | (2 sc, dec) x 3 | [9] |
FINISH
Do not stuff. Flatten at the last round and make 4 sc through both sides together to close. Fasten off and leave a long tail for sewing.

Big leaf sizes and colors used around the head.
Arms
Make 2 arms. Start with GREEN yarn and work in a continuous spiral.
| Round / Row | Instructions | Total |
| 1 | 6 sc in a magic ring | [6] |
| 2 | (inc) x 6 | [12] |
| 3-4 | 12 sc (2 rounds) | [12] |
| 5 | (2 sc, dec) x 3 | [9] |
| 6 | 9 sc. Stuff firmly. | [9] |
| 7 | 9 sc | [9] |
| 8-19 | Change to LIGHT YELLOW yarn. 9 sc (12 rounds). Do not stuff the light yellow section. | [9] |
CLOSE THE ARMS
Flatten the arm and crochet approximately 4 sc across the top through both sides to close. Chain 1, turn, fasten off and leave a long tail for sewing.
Eyes
Make 2 eyes. Start with BLACK yarn and work in a continuous spiral.
| Round / Row | Instructions | Total |
| 1 | 6 sc in a magic ring | [6] |
| 2 | (inc) x 6 | [12] |
| 3 | Change to AQUA yarn and crochet in BLO: (sc, inc) x 6 | [18] |
| 4 | Change to BLACK yarn and crochet in BLO: 3 sc, then in the same stitch {hdc, dc, hdc}, then 3 sc | [9] |
FINISH THE EYES
Leave an aqua yarn tail for sewing and knot / cut the other yarn tails. Embroider reflections with WHITE yarn using the reference photos.

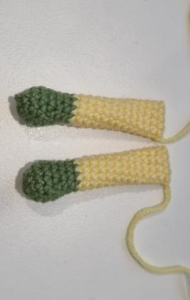

Arm and eye reference photos.
Branches
Each branch is made from three crocheted pieces – small, medium and main – that are joined through crochet. Make the small and medium pieces first and set them aside.
BRANCH TIPS
If a 4-sc magic ring is difficult, chain 2 and work the 4 sc into the second chain from the hook. The join rows are flexible: a stitch or two of adjustment is acceptable when positioning the side branches.
Small Branch – make 2
| Round / Row | Instructions | Total |
| 1 | 4 sc in a magic ring | [4] |
| 2 | inc, 3 sc | [5] |
| 3 | inc, 4 sc | [6] |
| 4 | (sc, inc) x 3 | [9] |
| 5 | (2 sc, inc) x 3 | [12] |
| 6-9 | 12 sc (4 rounds) | [12] |
| 10 | (dec) x 6 | [6] |
| 11-14 | Change to BROWN yarn. 6 sc (4 rounds). Sl st, F.O. and weave in ends. Do not stuff. | [6] |

Small branch reference.
Medium Branch – make 2
| Round / Row | Instructions | Total |
| 1 | 4 sc in a magic ring | [4] |
| 2 | inc, 3 sc | [5] |
| 3 | inc, 4 sc | [6] |
| 4 | (sc, inc) x 3 | [9] |
| 5 | (2 sc, inc) x 3 | [12] |
| 6-9 | 12 sc (4 rounds) | [12] |
| 10 | (2 sc, dec) x 3 | [9] |
| 11 | (sc, dec) x 3 | [6] |
| 12-13 | Change to BROWN yarn. 6 sc (2 rounds) | [6] |
| 14 | 5 sc, inc | [7] |
| 15-17 | 7 sc (3 rounds). Sl st, F.O. and weave in ends. Do not stuff. | [7] |
Main Branch – make 2
| Round / Row | Instructions | Total |
| 1 | 4 sc in a magic ring | [4] |
| 2 | inc, 3 sc | [5] |
| 3 | inc, 4 sc | [6] |
| 4 | (sc, inc) x 3 | [9] |
| 5 | (2 sc, inc) x 3 | [12] |
| 6-9 | 12 sc (4 rounds) | [12] |
| 10 | (dec) x 6 | [6] |
| 11-13 | Change to BROWN yarn. 6 sc (3 rounds) | [6] |
| 14 | 5 sc, inc | [7] |
| 15 | 7 sc | [7] |
| 16 | 6 sc, inc | [8] |
| 17-18 | 8 sc (2 rounds) | [8] |
| 19 | 7 sc, inc | [9] |
| 20 | 9 sc | [9] |
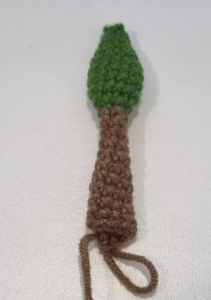

Medium and main branch pieces before joining.
Join the Medium and Small Branches
| Round / Row | Instructions | Total |
| 21 | Join the medium branch by working 2 sc together (one stitch on the main branch + one on the medium branch), 5 sc around the medium branch, 2 sc together on the opposite side, then 4 sc around the main branch. | [14] |
| 22 | (5 sc, dec) x 2 | [12] |
| 23 | (4 sc, dec) x 2 | [10] |
| 24-25 | 10 sc (2 rounds) | [10] |
| 26 | Join the small branch in the same way: 2 sc together (main + small), 4 sc around small branch, 2 sc together on the opposite side, then 8 sc around the main branch. | [14] |
| 27 | (5 sc, dec) x 2 | [12] |
| 28-30 | 12 sc (3 rounds) | [12] |
| 31 | 1 bobble stitch (place it on the front-facing side, a few stitches away from the small branch), 11 sc | [12] |
| 32 | (5 sc, inc) x 2 | [14] |
| 33 | 14 sc | [14] |
| 34 | (6 sc, inc) x 2 | [16] |
| 35 | (7 sc, inc) x 2 | [18] |
| 36-37 | 18 sc (2 rounds) | [18] |
BOBBLE STITCH
Work 5 unfinished dc into one stitch, leaving the final loop of each dc on the hook. Yarn over and pull through all loops to complete the bobble. See the Basic Crochet Techniques section for a visual guide.


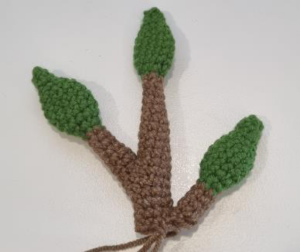
Joining the side branches to the main branch.
WIRE AND SHAPE
Fasten off and leave a tail for sewing. Cut wire to the length of the main branch and insert it through the branch. Stuff firmly around the wire, add stuffing up each side branch (not into the top leaf), then sew the small leaves to the branches in your preferred position.


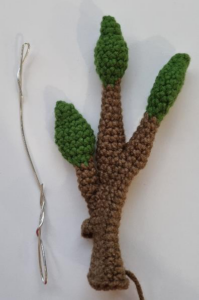
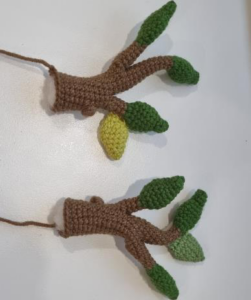
Finished branch structure, wire placement and leaf positioning.
Tunic
Work with Jeans 7203 yarn in turning rows.
| Round / Row | Instructions | Total |
| 1 | Chain 31 | [31] |
| 2 | From the second chain from hook: 30 sc, ch 1 to turn | [30] |
| 3 | 11 sc, ch 6 and skip 8 st, 11 sc, ch 1 to turn | [28] |
| 4 | hdc dec, 24 hdc, hdc dec, ch 1 to turn | [26] |
| 5 | 26 hdc, ch 1 to turn | [26] |
| 6 | hdc dec, 22 hdc, hdc dec, ch 1 to turn | [24] |
| 7 | 24 hdc, ch 1 to turn | [24] |
| 8 | hdc dec, 20 hdc, hdc dec, ch 1 to turn | [22] |
| 9-10 | 22 hdc, ch 1 to turn (2 rows) | [22] |
| 11 | hdc dec, 18 hdc, hdc dec, ch 1 to turn | [20] |
| 12 | 20 hdc, ch 1 to turn | [20] |
| 13 | hdc dec, 16 hdc, hdc dec, ch 1 to turn | [18] |
| 14 | 18 hdc, ch 1 to turn | [18] |
| 15 | hdc dec, 14 hdc, hdc dec, ch 1 to turn | [16] |
| 16 | hdc dec, 12 hdc, hdc dec, ch 1 to turn | [14] |
| 17 | hdc dec, 10 hdc, hdc dec, ch 1 to turn | [12] |
| 18 | hdc dec, 8 hdc, hdc dec, ch 1 to turn | [10] |
| 19 | hdc dec, 6 hdc, hdc dec, ch 1 to turn | [8] |
| 20 | hdc dec, 4 hdc, hdc dec, ch 1 to turn | [6] |
| 21 | hdc dec, 2 hdc, hdc dec, ch 1 to turn | [4] |
| 22 | (hdc dec) x 2, ch 1 to turn | [2] |
| 23 | hdc dec | [1] |
Diagonal Border
| Round / Row | Instructions | Total |
| 1 | Work sc evenly up the first diagonal, aiming for about 30 sc. | [30] |
| 2 | Chain 1 and turn, then work (sc, hdc, dc inc, ch 2) x 10. If your border has a different number of sc, repeat the sequence as many times as fits evenly. | [40] |
Repeat the same two border rows on the second diagonal so both sides match.
Fasten off and weave in all yarn ends.
Attach yarn to each upper corner and chain 15 for each strap. Cut and secure the yarn, then weave in the ends.

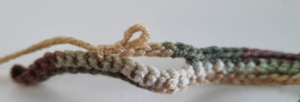
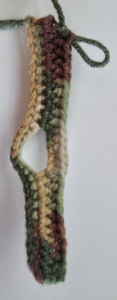
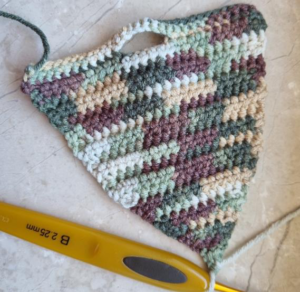
Tunic shaping, diagonal border and strap placement.
Hair
Work with KHAKI acrylic yarn in turning rows. The loop stitches should be approximately 9 cm / 3.5 inches long.
| Round / Row | Instructions | Total |
| 1 | Chain 11 | [11] |
| 2 | From the second chain from hook: 10 sc, ch 1 to turn | [10] |
| 3 | 10 loop stitches, ch 1 to turn | [10] |
| 4 | dec, 6 sc, dec, ch 1 to turn | [8] |
| 5 | 8 loop stitches, ch 1 to turn | [8] |
| 6 | dec, 4 sc, dec, ch 1 to turn | [6] |
| 7 | 6 loop stitches, ch 1 to turn | [6] |
| 8 | dec, 2 sc, dec, ch 1 to turn | [4] |
| 9 | 4 loop stitches | [4] |
BRUSH THE HAIR
Fasten off and leave a long tail for sewing. Cut the loops at their midpoint, then brush them away from the foundation-chain edge with a pet or carpet brush using short strokes until the yarn resembles hair.
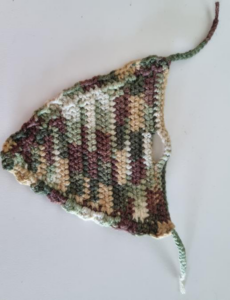
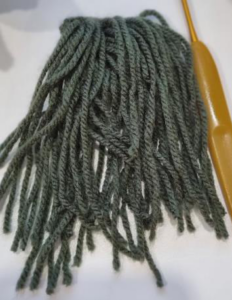
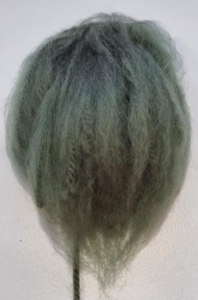
Hair mesh before and after cutting / brushing the loops.
Assembly
1. Head and Body
Pin the body to the underside of the head, centered on the seam where the head was sewn shut. Sew it in place using the body yarn tail and a yarn needle.
2. Arms
Pin one arm on each side of the body directly under the head, then sew them in place using the yarn tails.
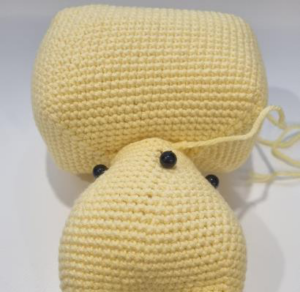

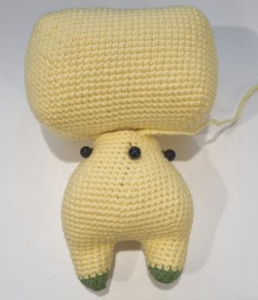


Assembly: joining the head and body, then positioning the arms.
3. Leaves
Arrange three big leaves on each side of the head, centered and slightly overlapping: darkest at the top, medium color in the middle, lightest at the bottom. Sew each leaf in place with its yarn tail. Add one small securing stitch through the overlapping portion of neighboring leaves so the group stays bundled rather than flopping apart.
4. Branches
Place the branches on top of the head, roughly along the center line and about one round above the leaves. Sew them on securely using the yarn tails.
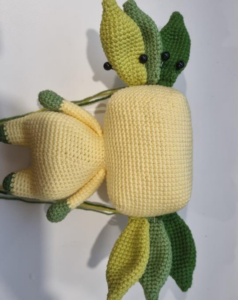

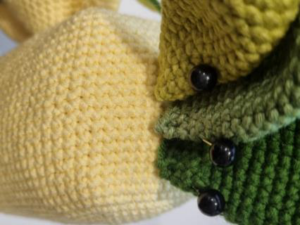
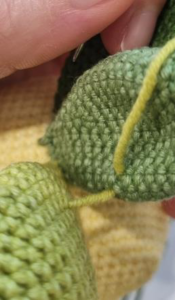
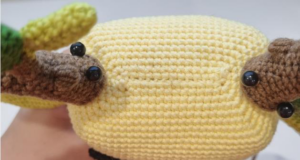

Assembly: positioning the leaf groups and branches.
5. Hair
Place the hair mesh on top of the head with the foundation-chain edge toward the back and the final row toward the front. The hair tips should reach slightly past the middle of the face. Sew the mesh in place using the long yarn tail.
6. Eyes
Place the eyes on the lower half of the head, approximately eight stitches apart. Sew them on with aqua yarn by stitching up under one aqua stitch and down through the next.
7. Bow – optional
Shape the bow from wire, wrap it with brown yarn and secure the yarn ends with glue. Tie a piece of grey yarn between the bow ends to form the bowstring.


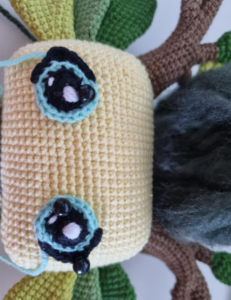

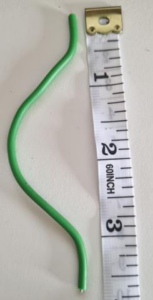
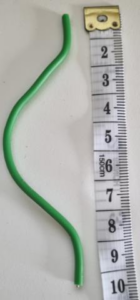

Assembly: hair placement, eye sewing and optional bow reference.
8. Eyebrows and Nose
Embroider the eyebrows with brown yarn. Start with a 3-stitch horizontal line two rounds above the outer half of each eye, then add a diagonal line across roughly a 4-stitch square. For the nose, use light yellow yarn centered between the lower parts of the eyes: make a 2-stitch horizontal line, wrap yarn around it several times, then fasten off.
9. Tunic
Place the tunic on the preferred side of the body and knot the straps. With the three leaf colors, make three decorative chains attached to the front and back of the tunic. Suggested lengths: bottom about 30 chains, middle about 27, top about 23. Adjust if needed and space them evenly. Weave in remaining ends.

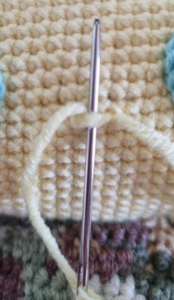
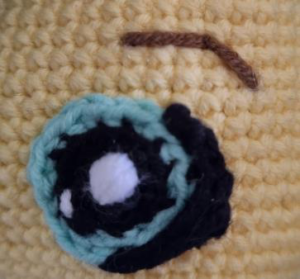


Assembly: eyebrow, nose and tunic finishing references.
Finished Result

Finished the forest spirit color variation.
Basic Crochet Techniques
The following reference section stays in the same order as the pattern PDF. Experienced crocheters can treat it as an appendix; newer makers can use it whenever a technique is referenced above.
1. Slipknot, Chain Stitch and Foundation Chain
Place the tail end of the yarn over the rest of the thread to form a loop.
Flip the loop over the yarn thread to make a pretzel-like shape.
Insert the hook below the thread.
Pull the hook up so a loop forms around it, then tighten the loop by pulling the thread.
Yarn over from back to front and pull through the loop on the hook. This forms the first chain stitch.
Repeat the previous step until the chain reaches the required length.


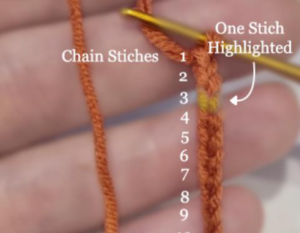

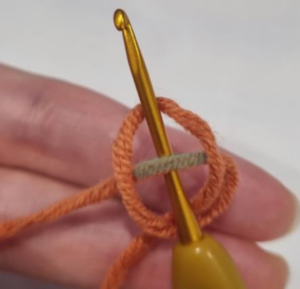
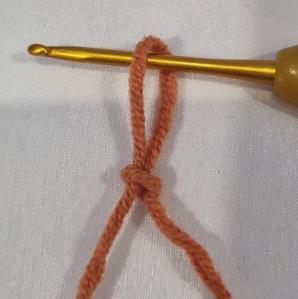
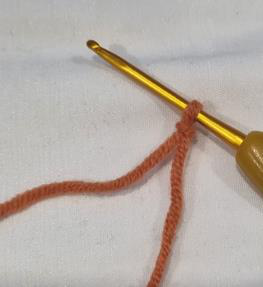
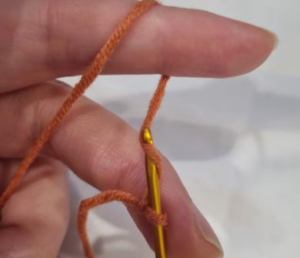
1. Slipknot, Chain Stitch and Foundation Chain – visual reference.
2. Anatomy of a Single Crochet Stitch
X-shaped stitches are created using the yarn under / yarn over method in single crochet. This creates a dense stitch that works especially well for amigurumi.
The sideways V at the top of each stitch is formed by two loops – front and back. Most crochet stitches are made by inserting the hook through both loops or through one of them, depending on the pattern.


2. Anatomy of a Single Crochet Stitch – visual reference.
3. Inserting the Hook Through a Stitch
By default, insert the hook under both top loops of the stitch unless the pattern specifies otherwise.
Back loop only (BLO): insert the hook under the loop furthest from you. This leaves the front loop visible as a ridge.
Front loop only (FLO): insert the hook under the loop closest to you. Continue the requested stitch after the hook is positioned.

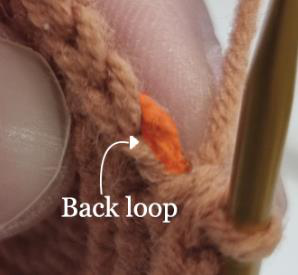
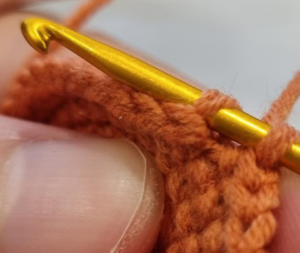
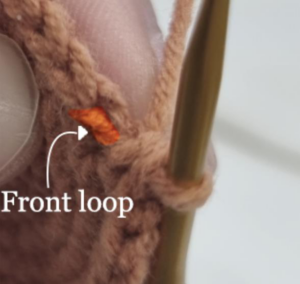
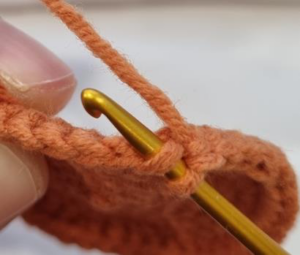
3. Inserting the Hook Through a Stitch – visual reference.
4. The Single Crochet Stitch
Single crochet (sc) is the main stitch used in amigurumi because it forms a dense fabric that contains stuffing well.
The pattern favors Yarn Under / Yarn Over (the X stitch). Yarn Over / Yarn Over creates a looser V-shaped stitch.
Insert the hook under the top loops and place the yarn under the hook. Pull the yarn back through the stitch.
With two loops on the hook, yarn over and pull through both loops.
Repeat into the following stitches as instructed.
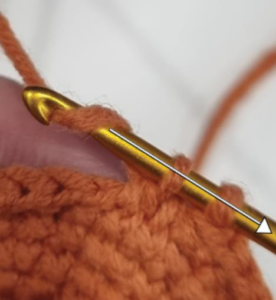
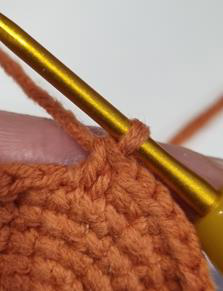
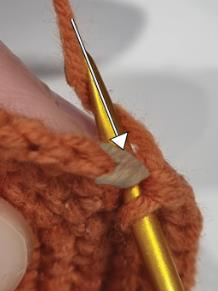
4. The Single Crochet Stitch – visual reference.
5. Working Single Crochet in Rows
Make a foundation chain.
Skip the first chain from the hook and work the first sc into the second chain.
Continue sc across the foundation chain.
At the end of the row, chain 1 to turn.
Turn the work horizontally. Do not work into the turning chain; start in the first stitch of the previous row.
Repeat until the required number of rows is complete.
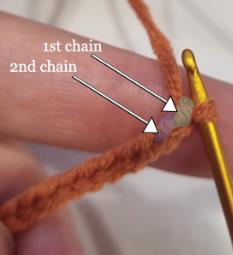
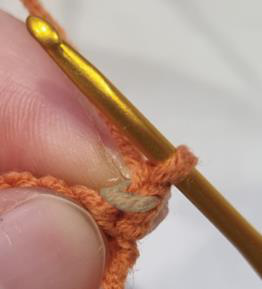
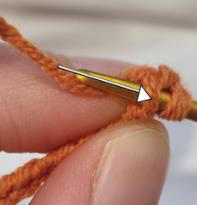
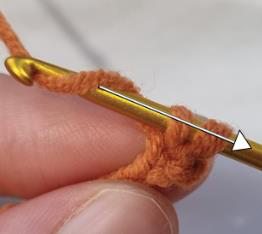
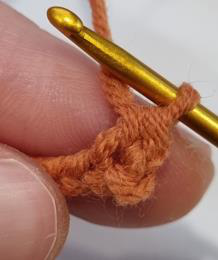

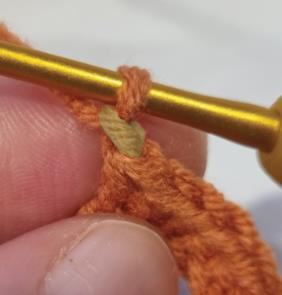
5. Working Single Crochet in Rows – visual reference.
6. Half Double Crochet
Half double crochet (hdc) is taller than sc and is useful for accessories or clothing sections where a little more height and drape are needed.
Yarn over.
Insert the hook into the next stitch, yarn over and pull through the stitch.
You now have three loops on the hook. Yarn over and pull through all three loops.
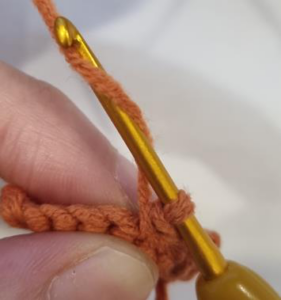

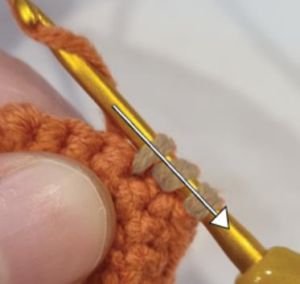
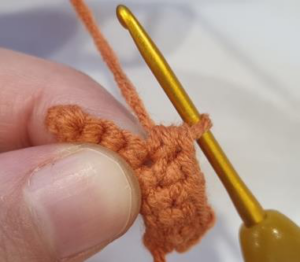
6. Half Double Crochet – visual reference.
7. Double Crochet
Double crochet (dc) is taller than both sc and hdc. In amigurumi it is generally used for accessories and shaping rather than the stuffed body.
Yarn over and insert the hook into the next stitch.
Yarn over and pull through the stitch. You now have three loops.
Yarn over and pull through the first two loops.
Yarn over once more and pull through the remaining two loops.
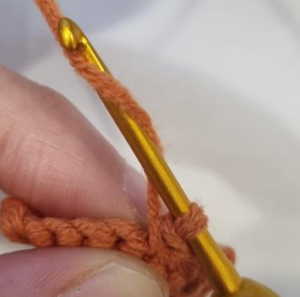


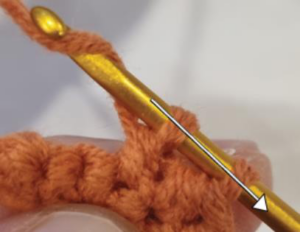
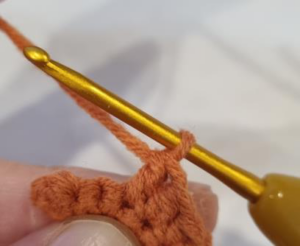
7. Double Crochet – visual reference.
8. The Magic Ring
Most amigurumi projects worked in a continuous spiral begin with a magic ring.
Wrap the yarn around the index and middle fingers as shown in the reference images.
Insert the hook under the first strand and over the second; pull the second strand under the first and twist it into a loop on the hook.
Yarn over and pull through to secure the loop, then remove the ring from the fingers.
Insert the hook through the ring and work the required number of single crochet stitches into it.
Pull the yarn tail to close the ring. Continue into the next round in a continuous spiral.
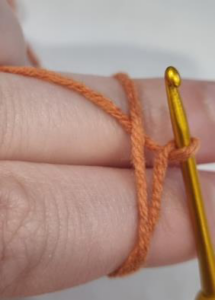


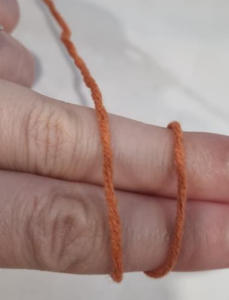
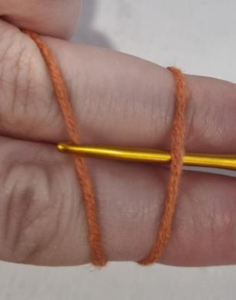

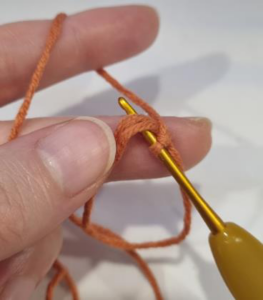
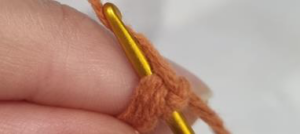

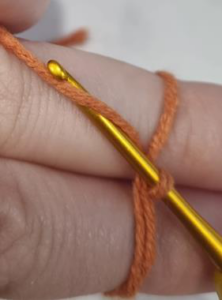
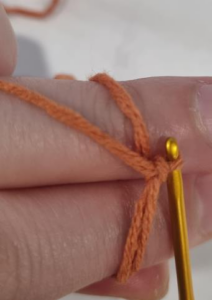

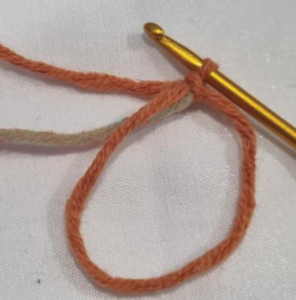
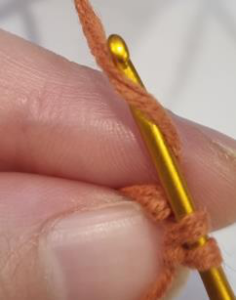

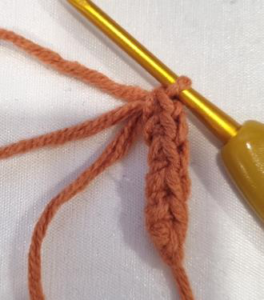


8. The Magic Ring – visual reference.
9. Increasing
An increase is made by working two or more stitches into the same stitch. For a single-crochet increase, work one sc normally, then insert the hook into that same stitch and work a second sc.
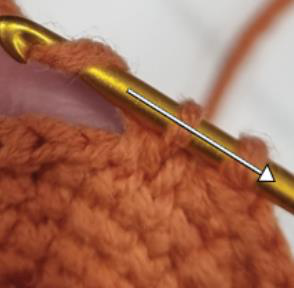
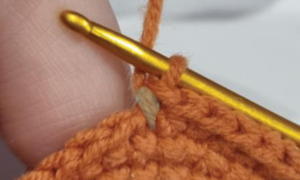
9. Increasing – visual reference.
10. Invisible Decrease
The invisible decrease reduces two stitches to one by working through front loops only.
Insert the hook through the front loop of the next stitch.
Insert the hook through the front loop of the following stitch.
Yarn over and pull through the first two loops on the hook.
Yarn over again and pull through the remaining loops to complete the decrease.


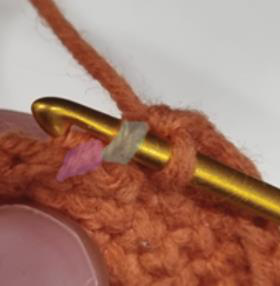
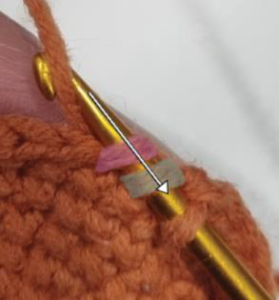
10. Invisible Decrease – visual reference.
11. Slip Stitch
The slip stitch is the shortest stitch and adds almost no height. It is used for joins, color changes and thin decorative lines.
Insert the hook into the next stitch and pull up a loop.
Pull the new loop directly through the loop already on the hook.
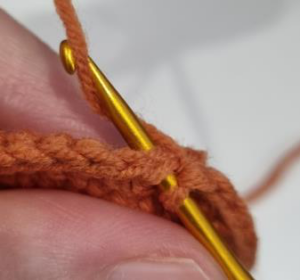

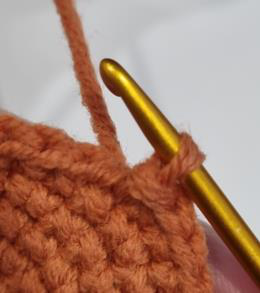
11. Slip Stitch – visual reference.
12. Color Changes
For a smoother color change, begin the change one stitch before the new color is required: start the stitch with the old color and finish it with the new color.
Insert the hook into the next stitch and pull up a loop with the old color.
Place the new color on the hook and pull it through both loops to finish the stitch.
Work a slip stitch in the next stitch, continue the round, then slip stitch again at the first slip stitch when the round closes.
Continue normally in the new color.
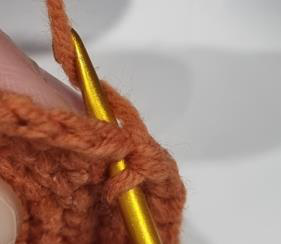
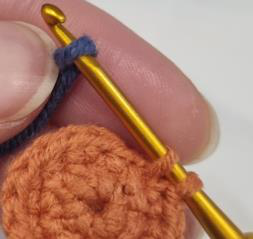

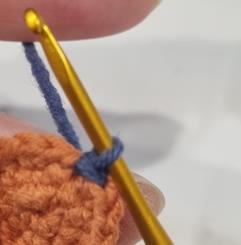
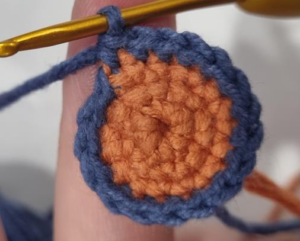

12. Color Changes – visual reference.
13. Crocheting Around a Chain
This method creates an oval or rectangular base while still allowing you to work in a continuous spiral.
Make a foundation chain of the required length.
Beginning in the second chain from the hook, work sc across and stop before the final chain.
Work 3 sc into the final chain to turn around the end.
Rotate the work and crochet along the underside of the foundation chain.
At the final loop, work an increase, then use the specified closing / marker method and continue in a spiral.
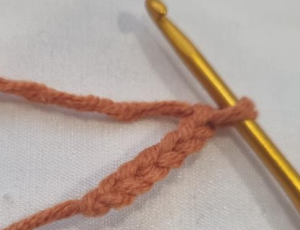


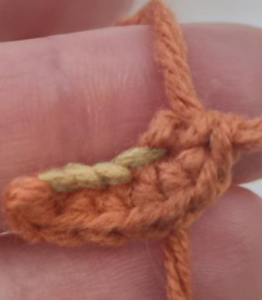
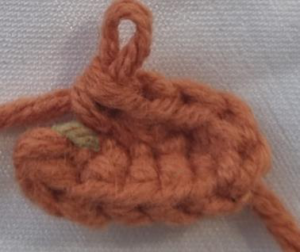

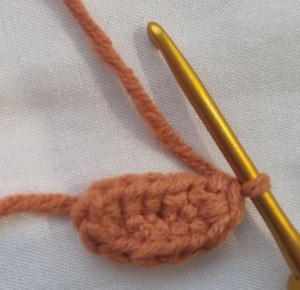
13. Crocheting Around a Chain – visual reference.
14. Identifying the Right Side
For work made in the round, the right side has the magic-ring tail on the inside, shows the neat X / V stitch texture on the outside, and is worked clockwise when held correctly.
For work made in rows, the position of the beginning-chain tail helps identify the correct side; in the reference, the starting chain sits to the left when the right side faces you.
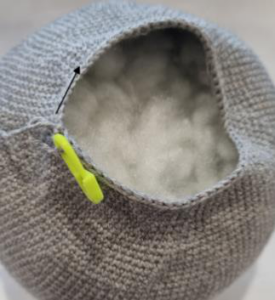

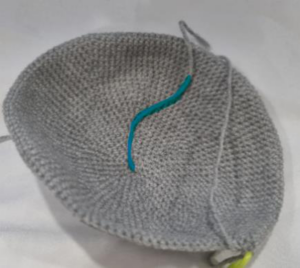
14. Identifying the Right Side – visual reference.
15. The Loop Stitch
Loop stitch is useful when creating fur or hair. After the loops are worked, they can be cut and brushed so the fibers resemble hair or fur. The the forest spirit hair section uses this technique.

15. The Loop Stitch – visual reference.
16. The Bobble Stitch
The bobble stitch is made from a cluster of stitches formed by working the beginning half of usually five double crochet stitches into the same stitch, then closing them together. It creates a raised, puffy texture and is used here on the branches.
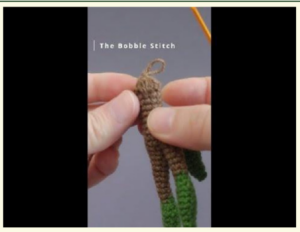
16. The Bobble Stitch – visual reference.
ARTICLE BODY END